In the Studio: Painting with Digital Stamps
Ready for some more tips + tricks I use in the studio?
This little lesson will show you how I use my digital stamps to paint a picture in Adobe Photoshop CS! For this page I used the Destination Edgers No.3.

Step 1: Star by selecting a background paper and a stamp. I chose the Le Marche Cardstocks which I then lightened, and the Destination Edgers No.3. Size and position as desired keeping in mind its always better to work big and scale down rather then the other way around!

Step 2: Make a new layer and turn off visibility on the stamp layer.
Step 3: With the new layer as your active layer, make the stamp an active selection by mousing over the layer thumbnail an[on a mac] command + click. [I believe it’s ctrl + click on a PC].
Step 4: I like to then hide the selection because I don’t won’t the marching ants to interfere with my vision 😉 So go to View>Show and uncheck selection edges
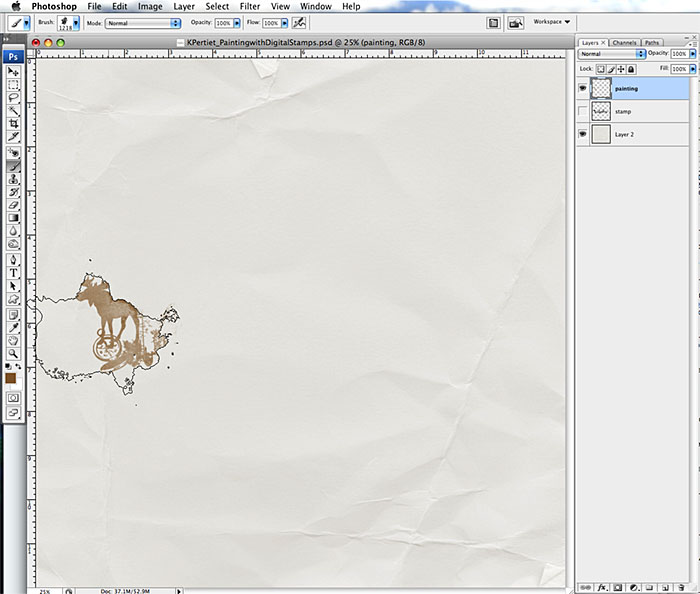
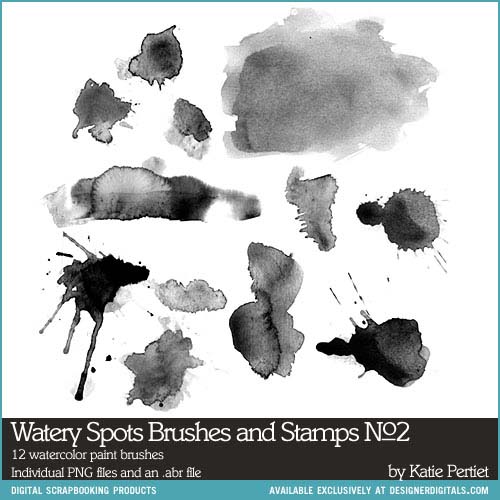
Step 5: Now comes the fun part! Select a brush [I used Watery Spots No. 2] and a foreground color. Rotate and scale brush as needed and then stamp.

Step 6: Repeat this step selecting a new brush, or rotating current brush, and a new color until your image is filled.

Step 7: Once your stamp image is filled it’s time to add your photos and journaling!
Simple as that!

Be sure to check out the new Watery Spots No. 2 + Watery Spots No. 3 new in the store this weekend. They are perfect for this technique!

Follow Us