In the Studio: Painting a Picture No. 2
As I said in the last lesson, there are so many ways to Paint a Picture withPhotoshop.
Today’s lesson is going to show some other approaches using different filters and instead of grouping the layers to apply one mask for all the layers, this lesson will show varying your masks for a more freeform approach.
Step 1: Add your photo
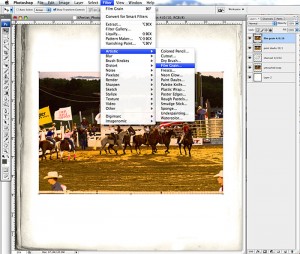
Step 2: Duplicate the original photo and apply a charcoal filter to the layer. I used settings of 1/4/32.
Step 3: Duplicate the original photo again and drag that layer above your charcoal layer. Then apply Filter>Artistic>Paint Daubs with settings 32/1
Step 4: Duplicate the original photo and drag the duplicate layer above your paint daubs layer. On this layer apply Filter>Artistic>Film Grain and I used the settings of 4/0/10
Step 5: Duplicate the original photo and drag the duplicate layer above your paint daubs layer. On this layer apply Filter>Artistic>Fresco and I used the settings of 8/3/1
Step 6: Turn off all the photo visibility except for the charcoal layer. Layer>LayerMask>HideAll to create a mask to do your painting in. Select a an acrylicor watery brush. In the brush palette select the shape dynamics and adjust the slider on the angles so the brush will paint randomly.
Step 7: Now turn on the visibility for the Paint Daubs layer and Layer>LayerMask>HideAll. Again select a brush like in Step 6 and paint.
Step 8: Repeat Step 6 again for the film grain layer and the fresco layer.
Step 9: Now comes the fun of experimenting with the blend modes for the layers.
I used the following blends:
Charcoal: base layer
Paint Daubs: linear burn
Film Grain: soft light
Fresco: soft light
I added in a painted layer of paper from Wild Horses for a more western flair. And the nice thing about working with masks is that you’re not damaging the original photo and can easily fill your mask with black and start over to achieve the desired affect. Lots of different possibilities when you’re working with masks!
Hoping you’re inspired too!


Follow Us